
Table of Contents
ToggleSecurity cameras are now standard equipment for homeowners protecting their properties. Whether you’re monitoring your front porch, driveway, or back entrance, understanding how security camera footage works, from capture to storage to legal implications, is essential for making smart purchasing and setup decisions. This guide walks you through the practical realities of security camera footage, storage options, and DIY system setup, so you can deploy effective surveillance without unexpected complications or surprises down the road.
Key Takeaways
- Security camera footage can be captured continuously or triggered by motion events, with continuous recording offering complete coverage but requiring more storage, while event-triggered recording is more efficient but risks missing incidents between activations.
- Resolution matters for identification: 1080p is suitable for general surveillance, 2K provides better detail for reading license plates and facial features, and 4K offers maximum clarity at the cost of significant storage and bandwidth requirements.
- Cloud storage offers remote access and automatic backup with monthly subscription fees ($3–$15 per camera), while local storage on NAS drives or DVR systems eliminates ongoing costs but requires manual management and puts footage at risk if the device is destroyed.
- A hybrid approach combining local NAS backup with cloud uploads provides the best security balance, giving you instant access to footage while maintaining an offsite backup for critical events.
- Camera placement succeeds when positioned 8–10 feet high facing entry points directly, using appropriate field-of-view angles, and mounted with weatherproof hardware away from backlight and glare to avoid blind spots.
- Before enabling audio recording, verify your local wiretapping and privacy laws, as many jurisdictions require consent for audio in areas where people expect privacy, such as neighboring properties or bedrooms.
Understanding Security Camera Footage Basics
Types of Footage Your Camera Can Capture
Security cameras capture video in one of two main formats: continuous recording or event-triggered recording. Continuous recording runs 24/7, capturing everything that happens in the camera’s field of view. This approach uses more storage but ensures you never miss an incident. Event-triggered recording activates only when the camera detects motion, sound, or other conditions you’ve configured. This is more storage-efficient and reduces the volume of footage you need to review, though there’s always a small risk you’ll miss something that occurs between motion events.
Most modern home cameras also record audio alongside video, though this carries legal considerations depending on your state and locale. Many jurisdictions allow audio recording on your own property without consent, but recording audio in areas where people expect privacy, like a neighbor’s yard or a bedroom, can violate wiretapping laws. We’ll touch on this more later, but the takeaway: know your local laws before enabling audio.
Resolution and Quality Explained
Camera resolution directly affects how clearly you can identify faces, license plates, or other details in your footage. Resolution is measured in pixels and typically described in terms like 1080p (Full HD), 2K, or 4K. A 1080p camera captures roughly 2 million pixels per frame and works well for general motion detection and identifying whether someone is present. 2K resolution (about 4 million pixels) offers noticeably sharper detail, making it easier to read a license plate or see facial features from farther away. 4K doubles that again but requires significantly more storage and bandwidth.
Frame rate, measured in frames per second (fps), also matters. Most home cameras operate at 30 fps, which is smooth for general surveillance. Some systems allow 60 fps, which captures smoother motion but doubles your storage needs. For most homeowners, 1080p at 30 fps strikes a reasonable balance between clarity and storage efficiency. If you’re concerned about identifying intruders or capturing vehicle details, stepping up to 2K resolution like Ring’s latest Outdoor Cam Plus is worth the extra storage cost.
Bit rate, the amount of data the camera encodes per second, affects both file size and quality. A typical 1080p stream uses 2–4 Mbps, while 2K might use 6–10 Mbps. Higher bit rates preserve detail but eat storage faster. If you’re on a limited internet connection or tight storage budget, check your camera’s bit rate settings before deployment.
Storage Solutions for Security Camera Footage
Cloud Storage vs. Local Storage
Every security camera system needs somewhere to store footage, and you have two primary paths: cloud storage or local storage (or a hybrid approach using both). Understanding the trade-offs helps you choose what fits your needs and budget.
Cloud storage streams your footage to a company’s servers (Amazon Web Services, Google Cloud, Wyze Cloud, Ring Cloud, etc.). The big advantage is accessibility: you can view your footage from anywhere on any device, and the data is automatically backed up off-site. If a burglar steals your camera, your footage is safe on the cloud. The downside is ongoing subscription costs, typically $3–$15 per month per camera, and reliance on your internet connection. If your broadband goes down, you lose real-time alerts and remote access. There’s also a privacy trade-off: your footage passes through a third party’s servers, so you’re trusting their security practices.
Local storage keeps footage on a device inside your home: a network-attached storage (NAS) drive, a dedicated DVR/NVR (digital or network video recorder), or even an SD card in the camera itself. You own the hardware, pay no monthly fees, and footage never leaves your property. The trade-off is that you need to manage the device yourself, ensure adequate drive capacity, and back up critical footage manually if you want redundancy. If a burglar destroys the storage device, that footage is gone forever.
Many modern systems let you combine both: record locally for instant access and instant replay, and simultaneously upload important events to the cloud as a backup. Services like CNET’s reviewed smart home systems often recommend this hybrid approach for serious security setups. For most homeowners, a cloud subscription paired with local NAS backup gives you the best of both worlds without excessive cost.
Storage capacity matters. A typical 2TB drive (common for NAS systems) stores roughly 5–10 days of continuous 1080p footage, depending on motion activity and bit rate. If you want 30 days of history, you’ll need 6–8TB. Calculate based on your camera’s resolution and expected activity before buying.
Setting Up Your DIY Security System
Choosing Camera Placement for Optimal Coverage
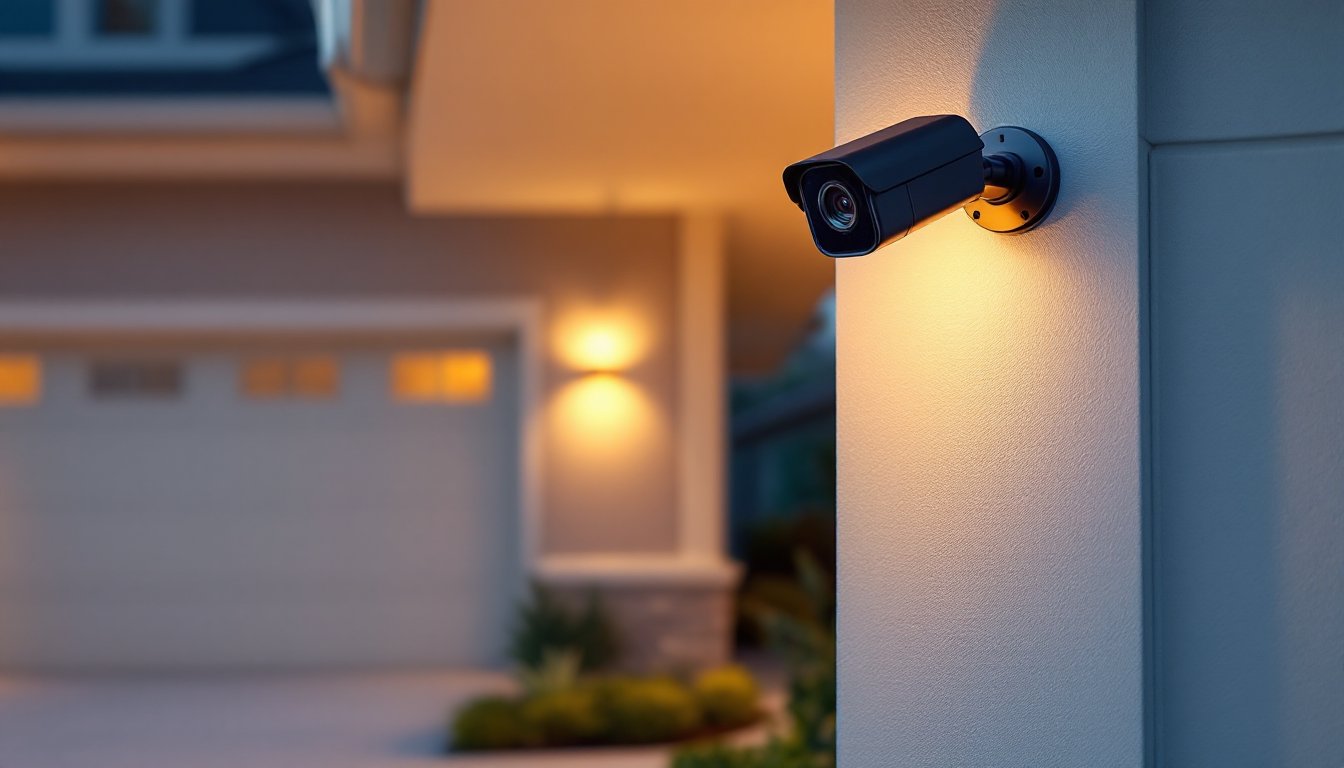
Camera placement is where most DIY setups succeed or fail. Poor placement leaves blind spots that negate the entire system. The goal is to cover entry points (doors, windows, gates) and high-traffic areas while minimizing wasted footage of empty walls or sky.
For a typical single-family home, start by identifying your entry points: front door, back door, garage, side gates, and any ground-floor windows. Install cameras to face these areas head-on, not at extreme angles. A camera mounted 8–10 feet high on your house corner works better than one mounted at eye level, it captures more ground area and is harder for intruders to disable.
Consider your camera’s field of view (FOV), typically 100–150 degrees. A wider FOV (150°) covers more area but makes distant details smaller. A narrower FOV (100°) zooms in tighter but sees less area. For a front porch, a medium FOV around 120 degrees usually strikes a good balance. If monitoring a long driveway, two cameras, one wide-angle at the house and one narrow-angle farther out, works better than one camera trying to do both jobs.
Weather and lighting matter. Mount outdoor cameras under eaves or overhangs to shield them from heavy rain and direct sun glare, which can wash out daytime video. Test your placement in low light: night vision quality varies, and a camera mounted facing a lit garage door will look blurry at night due to backlight. Position cameras to minimize backlight when possible.
Wiring and power are practical details. PoE (Power over Ethernet) cameras draw power through the network cable itself, needing just one conduit to the camera. Non-PoE cameras require both a network cable and a separate 12V power supply. PoE is cleaner if you’re running cables through exterior walls. Run all cables through conduit to protect them from weather and pests. For wireless cameras, ensure your Wi-Fi signal is strong at the camera location (test with a phone first).
Finally, think about mounting hardware. Use stainless steel fasteners and brackets for outdoor installations: regular steel rusts. For brick or stucco, use masonry anchors appropriate to your wall type. Drywall studs are ideal if your setup happens indoors. A camera sitting loose on a shelf looks unprofessional and can shift, ruining your coverage.
Once mounted, test your footage in both daylight and darkness, and walk through the monitored area to confirm you’re capturing the details that matter to you. Adjusting placement after installation takes only minutes and prevents weeks of regret later.