
Table of Contents
ToggleA kitchen backsplash isn’t just practical, it’s the visual anchor of your cooking space. Whether you’re renovating an entire kitchen or just freshening up the wall behind your stove, a farmhouse kitchen backsplash can instantly shift the mood from dated to charming. Farmhouse design thrives on authenticity and warmth, and the right backsplash choice pulls that aesthetic together without very costly. This guide walks you through the most popular farmhouse backsplash options, what to expect during installation, and how to pick materials that work for both your budget and your skill level. By the end, you’ll have a clear plan to tackle this project confidently.
Key Takeaways
- A farmhouse kitchen backsplash combines aesthetic charm with practical durability, serving as a visual anchor that instantly upgrades your cooking space.
- White subway tile remains the most versatile and popular choice for farmhouse backsplashes, costing $150–400 in materials for a typical 30-square-foot project.
- Shiplap and beadboard offer authentic farmhouse character at $1–4 per square foot but require regular sealing and maintenance to resist moisture and grease.
- Grout color and type significantly impact the final look—white grout creates a clean, unified appearance while gray or taupe grout adds definition and texture to your farmhouse design.
- Peel-and-stick vinyl tiles provide a budget-friendly, renter-friendly alternative lasting 3–7 years, though genuine tile offers superior longevity for permanent installations.
- Proper surface prep, precise layout planning, and patience during installation are more important than expensive materials to achieve a durable farmhouse kitchen backsplash.
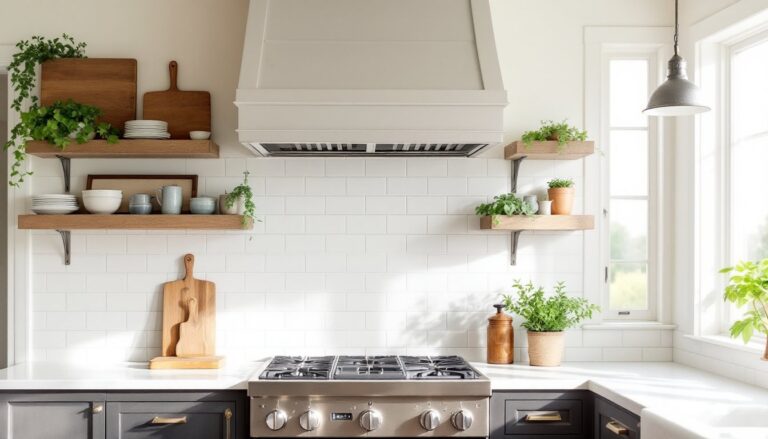
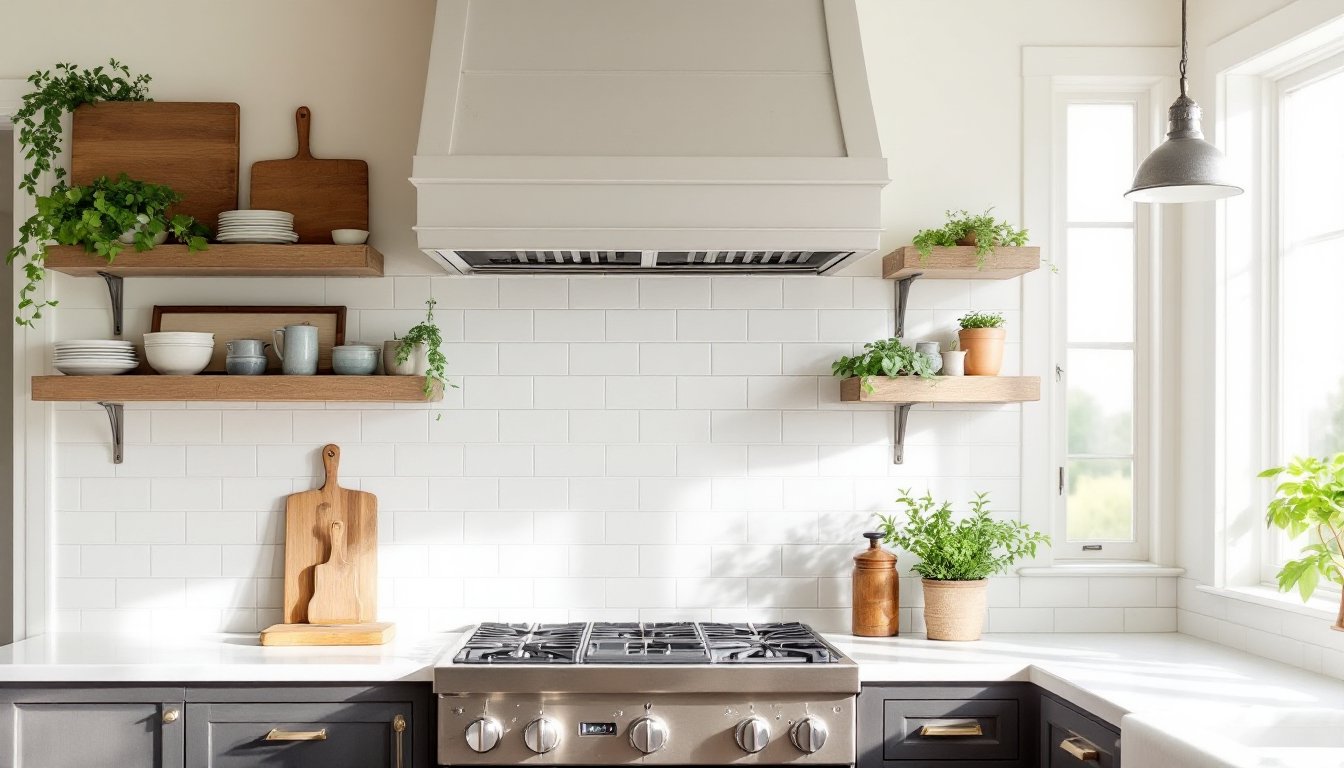
White Subway Tile: The Timeless Farmhouse Staple
White subway tile remains the gold standard for farmhouse kitchens. The classic 3-by-6-inch format (nominal dimensions: actual size runs closer to 2.75″ × 5.75″) creates clean horizontal lines that feel both vintage and contemporary. The smooth, glazed surface is forgiving: it wipes down easily and resists staining better than matte tiles.
Subway tile’s strength is versatility. You can run it in a simple brick pattern (offset rows), stagger it for visual interest, or go with a herringbone layout for something more refined. The humble white tile adapts to farmhouse kitchen backsplash ideas ranging from ultra-minimal to cottage-cozy.
One practical consideration: white glazed subway tile can show water spots and fingerprints if your grout lines aren’t sealed. Budget for a quality grout sealer (typically $15–30 per quart) and reapply every 1–2 years. Most DIYers can handle tiling subway tile themselves if they’ve set tile before: if you’re new to it, plan for a learning curve on the first few rows.
Cost runs $3–8 per square foot for the tile itself, plus grout, adhesive, and sealer. A typical backsplash (30 square feet) lands in the $150–400 range for materials before labor or professional installation.
Shiplap and Beadboard Alternatives for Authentic Charm
If tile feels too slick for your vision, shiplap or beadboard delivers authentic farmhouse character. Shiplap, those overlapping horizontal boards with a shallow rabbet joint, became synonymous with farmhouse style. Beadboard (vertical boards with a decorative rounded edge detail) offers a slightly different aesthetic but the same rustic appeal.
Both materials are wood-based and require more maintenance than tile. They’ll need to be sealed or painted to resist moisture and grease splatter. Use a semi-gloss or satin-finish paint rated for kitchens: flat finishes won’t hold up near the stove. Apply primer first, then two coats of paint. A standard 30-square-foot backsplash uses about 1.5–2 gallons of paint (primer + topcoat combined).
Installation is more forgiving than tile: a level, a stud finder, trim nails, and a nail gun or hammer get the job done. Boards are typically 0.75″ thick (actual dimension) and come in various widths. Shiplap and beadboard run $1–4 per square foot, making them genuinely budget-friendly. The tradeoff is ongoing upkeep. If you live in a steamy, grease-heavy kitchen, tile outlasts wood.
Hybrid approaches work too. Many homeowners frame a shiplap or beadboard backsplash ideas found in country-style design guides with tile trim or a tile border to protect the wood at the stove’s edge and splash zone.
Choosing the Right Grout Color and Finish
Grout choice can make or break your farmhouse tile backsplash for kitchen projects. White grout on white subway tile creates a clean, unified look, very Scandinavian farmhouse. Gray or taupe grout introduces definition and texture, emphasizing the tile pattern. Darker grouts (charcoal, black) work in more dramatic farmhouse schemes but can read as industrial rather than warm.
Consider your kitchen’s light. Dark grout in a north-facing kitchen absorbs light and can feel heavy. The same grout in a bright, south-facing space reads as sophisticated. There’s no wrong choice, only mismatched intentions.
Sand vs. unsanded grout matters for practical reasons. Unsanded grout works best for grout lines narrower than 1/8″: it’s easier to apply cleanly and leaves fewer air pockets. Sanded grout (which contains fine sand particles) fills wider joints more effectively and resists cracking in larger gaps. Most residential tile work uses sanded grout in 1/8″ to 1/2″ widths.
After installation, seal all grout with a penetrating sealer within 72 hours. Unsealed grout stains, discolors, and eventually fails. Resealing every 1–3 years keeps your backsplash looking fresh. A small can of grout sealer ($12–20) covers a typical backsplash multiple times.
Budget-Friendly Farmhouse Backsplash Materials
Peel-And-Stick Tiles and Vinyl Options
Peel-and-stick tiles have evolved far beyond the bathroom-quality stickers of a decade ago. Modern adhesive-backed tiles mimic genuine subway tile, shiplap, and even some handmade looks at $0.75–3 per square foot. Brands like Vinyl Safety, Stick Pretty, and others produce convincing farmhouse patterns.
They’re genuinely DIY-friendly: clean the wall, measure and mark your layout, peel the backing, and press each tile in place. No adhesive, grout, or special tools required. If you mess up, peel and reposition (though repeated handling degrades adhesive).
The catch: peel-and-stick tiles aren’t as durable as ceramic or porcelain. They discolor, peel at edges over years, and won’t tolerate heavy scrubbing. In a low-traffic kitchen, they last 5–7 years comfortably. Near the stove or in a busy household, expect 3–5. They’re ideal for renters, quick refreshes, or kitchens headed for a full remodel soon anyway.
For a permanent solution, vinyl wallpaper designed to look like farmhouse tile (including subway patterns) runs $20–50 per roll and covers roughly 30 square feet. Installation is similar: measure, cut, apply adhesive-backed vinyl, smooth out bubbles. It’s more durable than peel-and-stick and hides imperfect walls, but it’s technically wallpaper, not tile, and purists won’t mistake it for the real thing. Kitchen design guides often compare these temporary solutions to help homeowners weigh durability against upfront cost.
Installation Tips for DIY Success
Proper prep beats fancy technique every time. Before laying a single tile, your wall must be clean, flat, and stable.
Surface prep: Use a putty knife and degreaser (or TSP, trisodium phosphate) to remove grease, grime, and loose paint. Dull shiny surfaces with fine 120-grit sandpaper so thinset mortar grips better. Fill holes and gouges with lightweight joint compound: sand smooth after drying. If your wall is very uneven (more than 1/4″ in 10 feet), use self-leveling compound before tiling, it saves headaches and prevents hollow spots under tiles.
Layout and spacing: Snap chalk lines to mark the center of your backsplash horizontally and vertically. Dry-lay tiles (no mortar) to check your pattern and ensure you don’t end up with thin slivers at the edges. Adjust the starting line slightly to avoid narrow cut tiles. Use tile spacers (plastic X or T-shaped guides) to maintain consistent grout line width, typically 3/16″ for farmhouse subway tile.
Adhesive and trowel selection: Use modified thinset mortar (latex-modified, not epoxy) for ceramic or porcelain over drywall. For a 3×6″ subway tile, use a 1/4-inch notched trowel held at a 45-degree angle to comb consistent ridges. Too much mortar or too little leaves voids or surface irregularities. Test the first few tiles by gently pressing and twisting, they should stay firmly set.
Cutting tiles: If you need cuts, rent a wet saw ($25–40 per day) from most tool rental shops. A wet saw produces clean, straight cuts with minimal chipping. A handheld glass cutter works for straight cuts in a pinch but leaves fragile edges. Always wear safety glasses and a dust mask when cutting.
Grouting and sealing: After mortar cures (typically 24 hours), mix grout to a peanut-butter consistency and apply with a rubber float held at a 45-degree angle, pressing grout into all joints. Remove excess by wiping diagonally across tiles with a damp sponge. Let cure per manufacturer instructions (usually 24–48 hours), then apply grout sealer. Use painter’s tape along trim or edges where backsplash meets cabinets to prevent sealer overflow.
Common mistakes to avoid: Don’t skip adhesive ridging, it creates a complete bond. Don’t grout too early: let mortar cure fully or your tiles may shift. Don’t flood grooves with water during cleanup: it weakens grout. And don’t assume one coat of sealer is enough: reapply every year or two.
For most DIYers tackling their first backsplash, country-style home renovation approaches emphasize patience over speed. A methodical weekend beats a rushed, sloppy install that you’ll regret for years.
Conclusion
A farmhouse kitchen backsplash transforms your cooking space with minimal complexity and maximum visual impact. Whether you choose classic white subway tile, authentic shiplap, or budget-conscious peel-and-stick options, the key is matching your choice to your skill level, maintenance tolerance, and long-term vision. Prep work and patience matter far more than fancy materials. Start with accurate measurements, seal your grout, and you’ll enjoy a durable, charming backsplash that pulls your farmhouse kitchen together for years to come.